Self-Installation in 7 easy steps
The installation of a Fibro pool or spa is completed in just one day, minimizing any potential land disruption caused by machinery. Our products are designed for versatile installation on all types of surfaces, saving you the hassle of complicated site preparations. With our "Plug and Play" concept, the installation process is streamlined and straightforward. No matter the project, the steps to bring your vision to life remain consistent.
A typical one-day installation for a Fibro pool or spa involves 7 simple steps.
Before you begin, make sure you have the necessary materials:
- A leveling tool
- 0.5-inch crushed stone
- The MIRAFI-type geotextile membrane provided by Fibro Pools
- 10-inch diameter dewatering well, also supplied by our team.
Plumbing Preparation
-
Begin by connecting the pipes, allowing the adhesive to dry in preparation for the basin installation.
-
Planning the placement of the filtration system in advance ensures that you can cut and glue the piping for optimal strength and durability.
-
Once the location for the filtration system is determined, dig a trench to bury the piping after completing the connections.
Excavation
-
Ensure the excavation for the basin exceeds its size by 6 inches on all sides.
-
For rectangular models with a flat bottom, excavation can be completed without a template before the basin is delivered.
-
The depth of the excavation should be 6 to 10 inches deeper than the basin, depending on the soil type: 10 inches for clay soil, and 6 inches for sandy or rocky soil.
-
To simplify installation, plan to excavate the areas for the skimmer and dewatering well slightly higher than the basin level
-
Important: The final level of the installed basin must be 6 inches above the surrounding terrain.

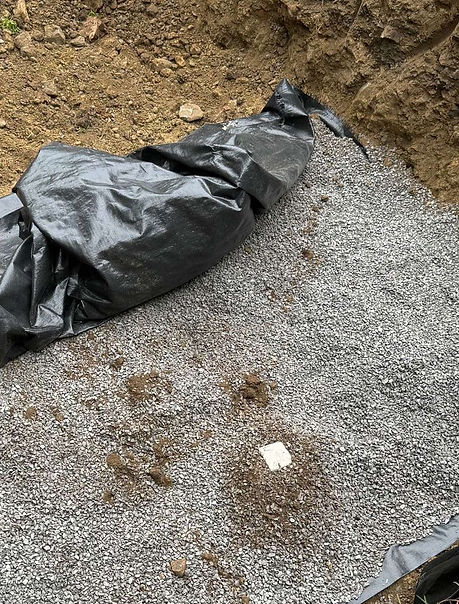
Preparing the stone bed
-
Once the excavation is complete, lay the geotextile membrane (supplied by FIBRO) at the bottom of the hole.
-
Cover the membrane with a bed of crushed stone. The stone should be 0.5 inch net. The thickness of the stone bed will be between 6 to 10 inches and is to be determined even before the excavation.
-
Make sure the stone bed is even and level, using the footed (transit) level.
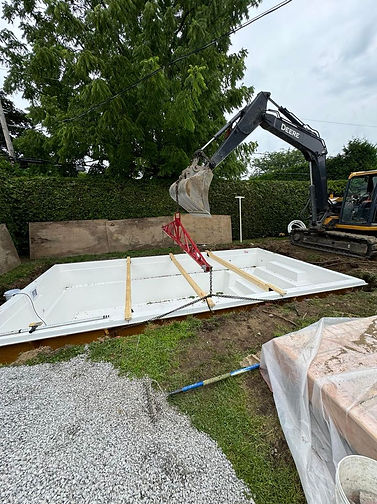
Setting up the pool
-
Take care not to damage the piping and the skimmer when lowering the pool.
-
Once the basin is in position, check if it is well supported on the bed of crushed stone.
-
Use the leg level (transit) to ensure the height and level of the basin.
-
After checking, start filling the pool with water.

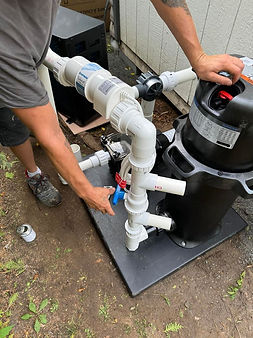
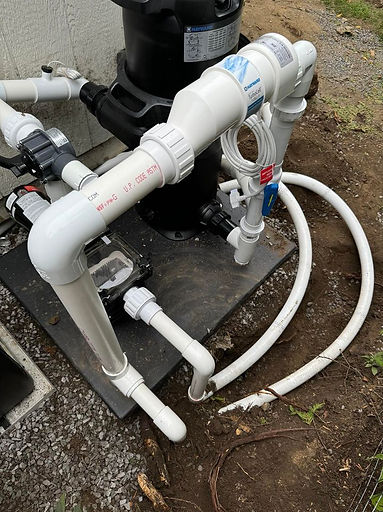
The piping connection
-
In a single, straightforward step, connect the piping to the filtration system, including the suction and return pipes.
-
No adjustments are needed, as all pool piping has been pre-installed and thoroughly tested at the factory.
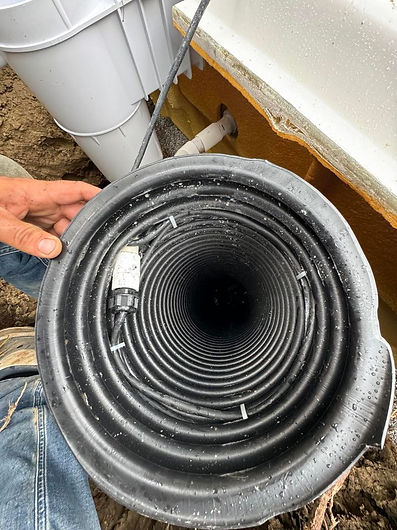
Installation of the dewatering well/ manhole well
-
Use the 10 inch diameter perforated drain supplied by Fibro.
-
Define the location of the dewatering well, close to the light. Note that it should be placed around the deepest part of the basin, between the latter and the excavation.
-
The depth of the well must always exceed the depth of the pond by 10 inches.
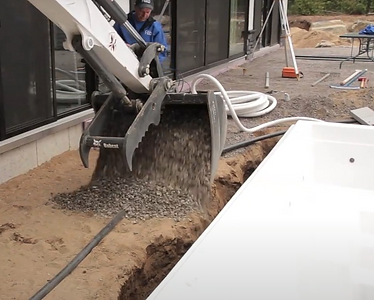
The backfill
-
Before starting the backfilling stage, make sure that the basin is already filled with a few inches of water.
-
Fill the space between the wall of the basin and that of the excavation with crushed stone 0.5 inch net,.